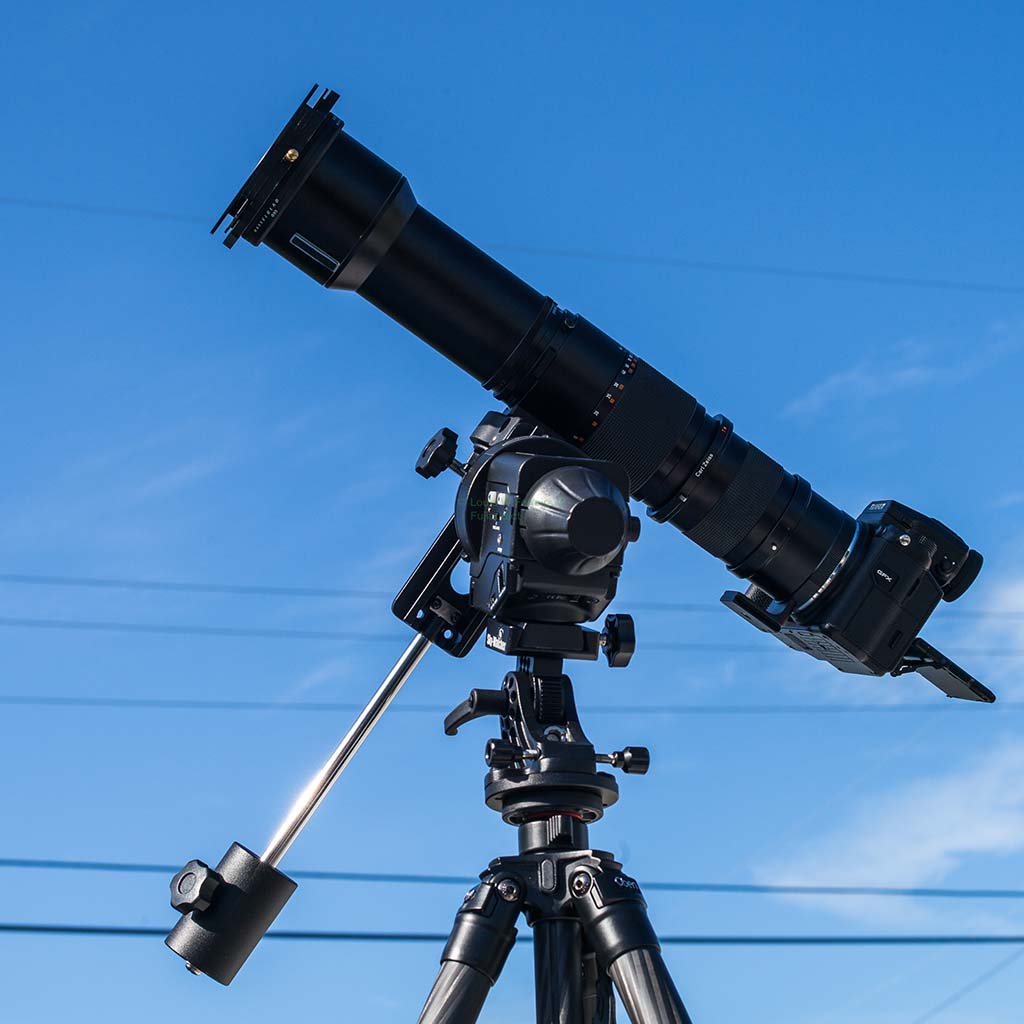
Believe it or not, there are a few Fujifilm GFX photographers looking to capture the Solar eclipse this year and we are actively discussing our plans in the Fujifilm GFX Owners Group. Some are using full frame adapted glass to gain the reach needed despite the 0.78x crop factor, while I chose to go a more traditional route. The Hasselblad Telephoto 500mm f/8 CF Zeiss Tele-Apotessar Lens, but I didn’t stop there because I wanted to fill more of the frame I found a Hasselblad Zeiss Mutar 2X Teleconverter T* CF to provide 1000mm of reach (780mm after reverse crop). This is mounted via a FotodioX Hasselblad V Lens to Fujifilm G-Mount Camera Pro Lens Mount Adapter to my Fujifilm GFX 50S and it is rock solid!
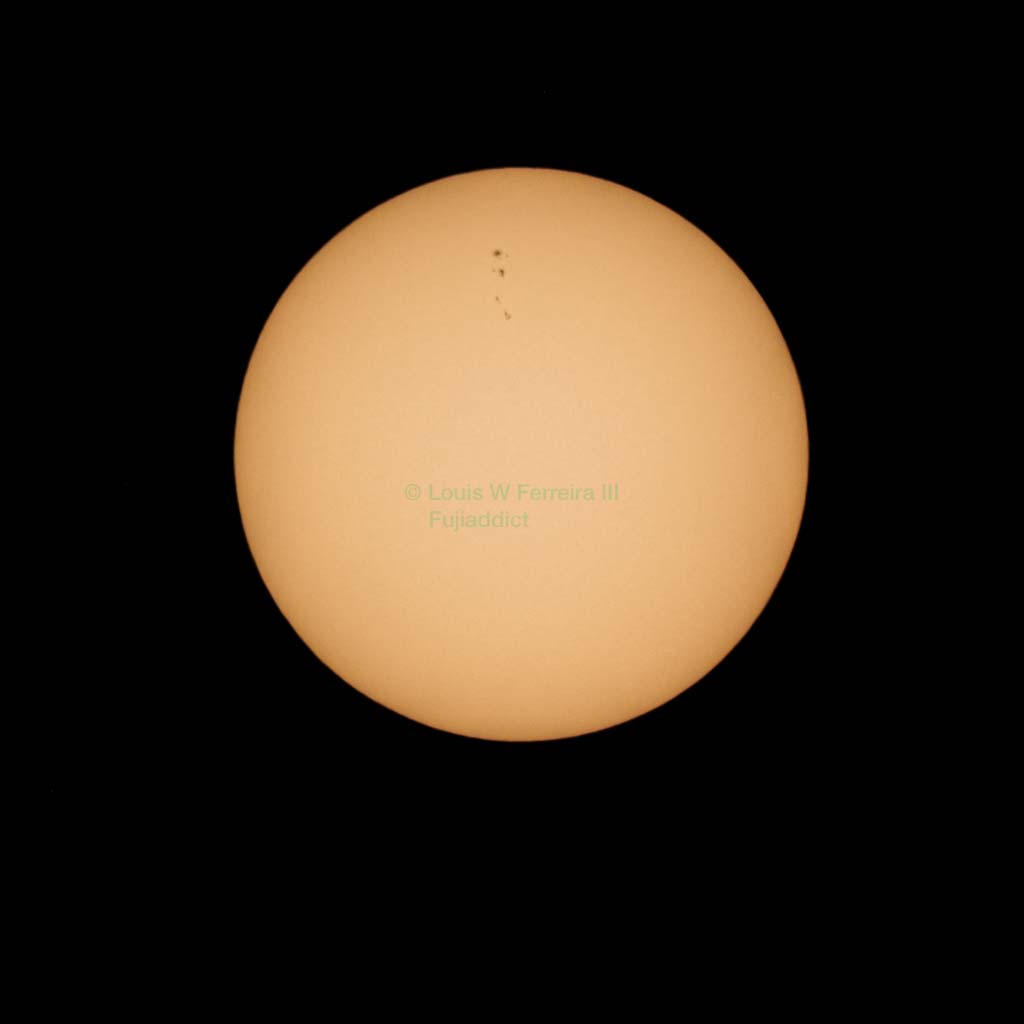
I then picked up a LEE Filters Hasselblad 93 Adapter Ring for my LEE Filters 100mm System Deluxe Landscape Starter Kit along with the LEE Filters 100x100mm Solar Eclipse Filter (which can be purchased with the foundation kit). This should give me all the reach and resolution necessary to capture the event. I can see Sun spots pretty clearly, which is a good sign and there is no chromatic abbreviation to be seen.
If you are lucky you can use a pro photo shop like B&H to build your ultimate GFX Solar or even deep sky Astro rig because it quickly becomes a very complex setup including a specific assembly/disassembly procedure (so you don’t trigger the lenses shutter and have to wind it manually with a screwdriver). Pro photo shops can help you learn about some of the more nuanced stuff, especially if you aren’t familiar with Hasselblad gear. My lens and teleconverter can be incredibly hard to come by, but they are worth the effort in my opinion because my super-telephoto solution completely covers the GFX sensor.
After practicing on my Oben CT-2491 Carbon Fiber Tripod and BC-166 Ball Head I decided to go with a more automated solution so I could enjoy the eclipse more and maybe shoot some handheld shots with my Fujifilm X-T2 with a more modern lens. Tracking the sun with a heavy camera on a ball head isn’t the best way to spend your afternoon.
So I picked up the Sky-Watcher Star Adventurer and almost all of its accessories because I didn’t want anything I needed to sell out. The necessary accessories for the configuration above are the Sky-Watcher Star Adventurer Equatorial Wedge Base and Sky-Watcher Star Adventurer Counterweight Kit because the Sky-Watcher Star Adventurer Dec Bracket is included in the Sky-Watcher Star Adventurer Kit from B&H. The above configuration lets me track the Sun for 3+ hours when properly polar aligned.
It took me a while to get daytime polar alignment down, but I highly recommend the Equatorial Wedge Base for daytime alignment, because it makes setting up latitude very simple and then your smart phone does the rest, by helping to find true north. There are lots of methods for doing this, but I really like Polar Scope Align Pro.
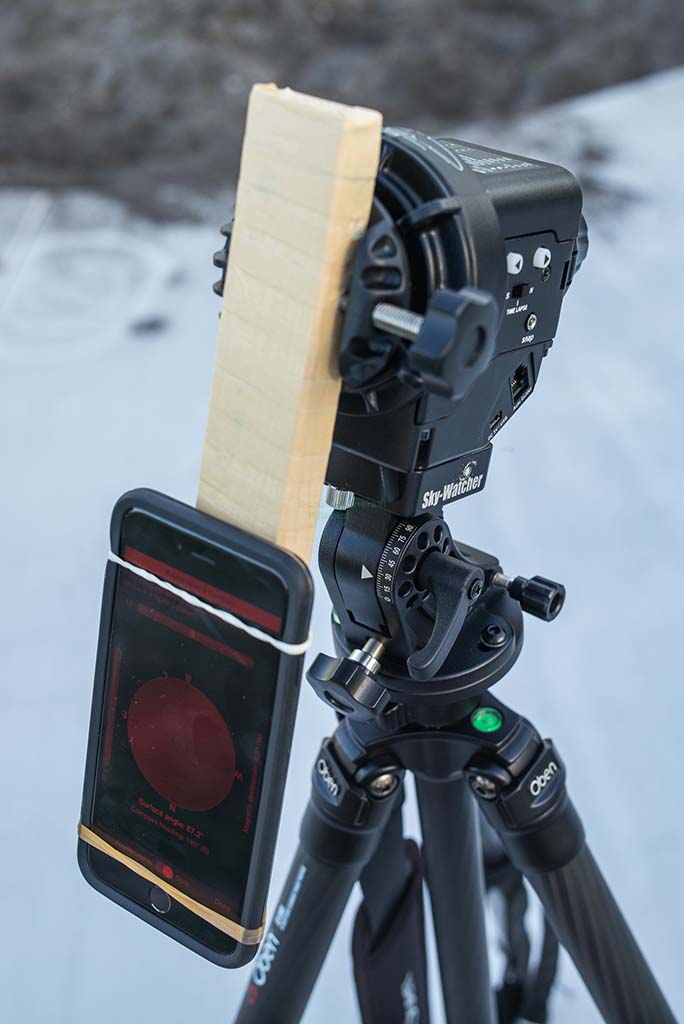
Proper alignment is key and I practiced several times a day setting up my rig tracking the Sun and Moon. You can use daytime alignment methods during the day and night so feel free to practice whenever and since the moon is pretty much gone now you can test your alignment on a star. One thing I found helped a lot was using a 12-inch piece of wood in the Sky-Watcher to mount my phone and avoid magnetic interference. Home Depot didn’t have a piece of nice wood that would fit so I just wrapped the wood in some tape to avoid splinters and protect my phone from slipping since only two rubber bands hold it in place.
There are several ways you can adjust the unit to line the scope up with true north and get the proper latitude, but I found the best for me was starting at 90 degrees as per Polar Scope Align Pro’s directions and using a combination of the daytime alignment tool and compass. I also found my alignments to be more accurate when using the “Use True North” setting on my iPhone in the phone settings.
This solution is pretty much a “set it and forget it solution” and once you have the sun locked in you barely have to touch it while waiting for the eclipse to begin. My plan is to center the Sun shortly before the eclipse begins and to operate the camera via Fujifilm’s app while shooting a variety of other cameras handheld and possibly filming. Beyond those necessary tools I also highly recommend the solar eclipse timer app(iOS and Android) so you can spend less time thinking about the phases and more time focusing on the experience and your equipment. One last thing.
If you’re really into the eclipse Smarter Every Day has some great videos here, here and here. Let’s hope everyone has good weather.
Follow Fujiaddict on Facebook and Twitter. Follow me on 500PX, Instagram, and YouTube. I’ll try to do some live coverage if I am not overwelmed.
